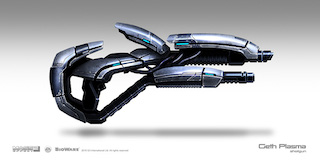
Geth Plasma Shotgun
Prop Build
Hey all! Been a long time coming, but finally, I bring you the Geth Plasma Shotgun writeup.
This was by far my most ambitious undertaking in terms of prop work yet. Looking at the finished product, I can say I'd do some things differently, as my design ran into many, many pitfalls along the way that I didn't predict. Hopefully, this will help some folks out there who want to build this for themselves.
So, here we go: One Geth Plasma Shotgun coming up!
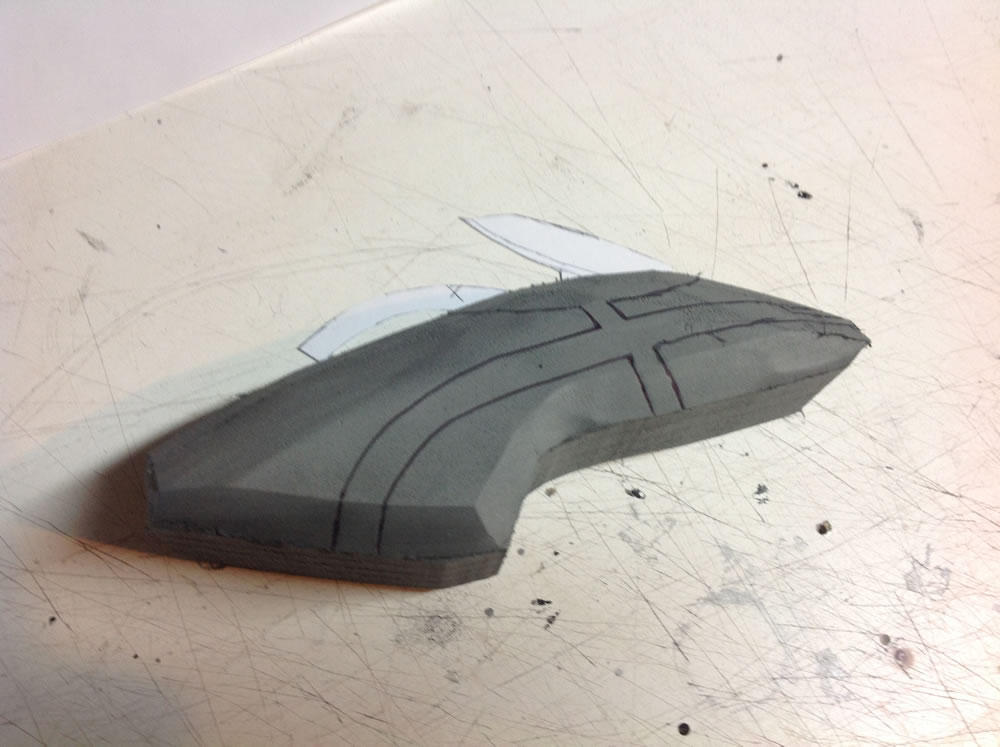
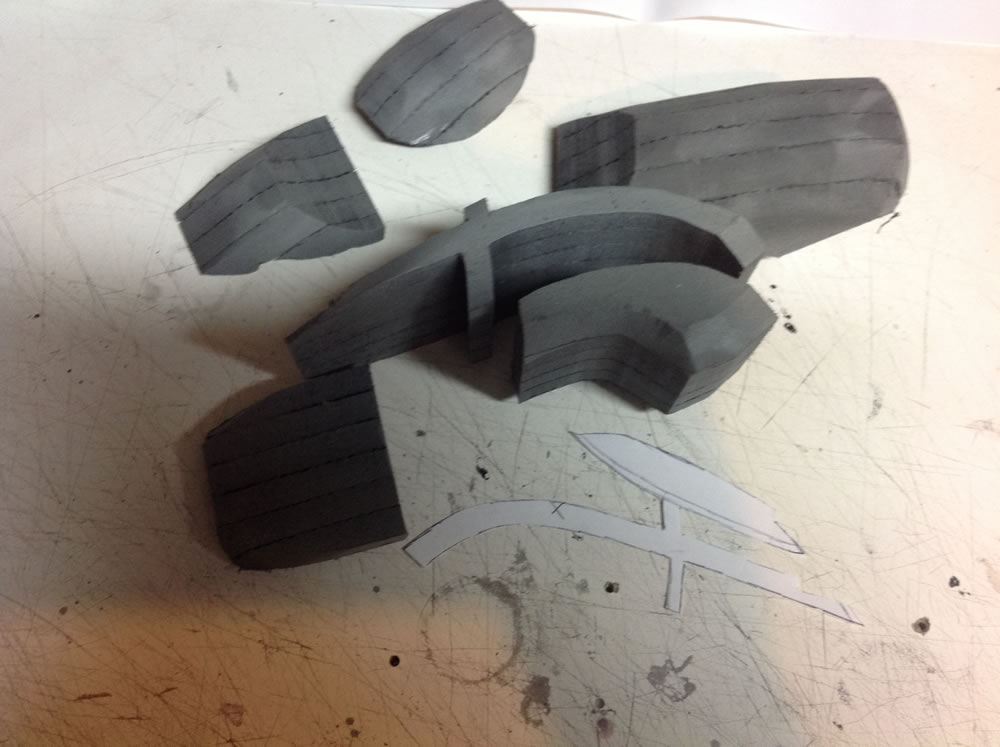
Rough shape cut out, designs drawn.
To start off, I used the traditional method I've always used for constructing props (I'll just summarize briefly, see another build write-up for more details.) by cutting out many copies of the rough shape, gluing them together, and running the whole thing through my band saw. This produces a very consistent shape with good angles. From there, I used my hot knife to cut the bevels, and smoothed everything with the large Dremel wheel.
Lately, I've adopted a technique from a friend where I sand, prime, sand, and prime to get a good metal friendly finish. If you're going to do this, do what I did: leave it rather rough. This leaves more material on the piece for use later in the smoothing process. Otherwise, once you're all smoothed out, you may realize you don't have quite the right size you wanted in each component.
After that, I used a simple ball point pen to draw the designs onto the piece. Nothing overly complicated there. You can either cut up the template like I did, or, if you trust your eyes, hand draw it. There are a few points where you'll need to just trust your eyes, but in this case, the pieces were big enough.
Exploded view!
Moving along, I ran the piece through the band saw once more to break up all the individual sections. The Geth weapons are literally covered in gouges and little grooves, which is a design I love as an artist and hate to death as a prop builder. Initially I thought to build smaller "core" sections and then build on top of that with sintra or foam, but in the end, this just seemed easier. I took the inner part you see, the large T shape, and cut it's outer edge out, meaning once re-assembled, it was a uniform, and more importantly, clean groove in the surface. Just a hot knife and a good eye there.
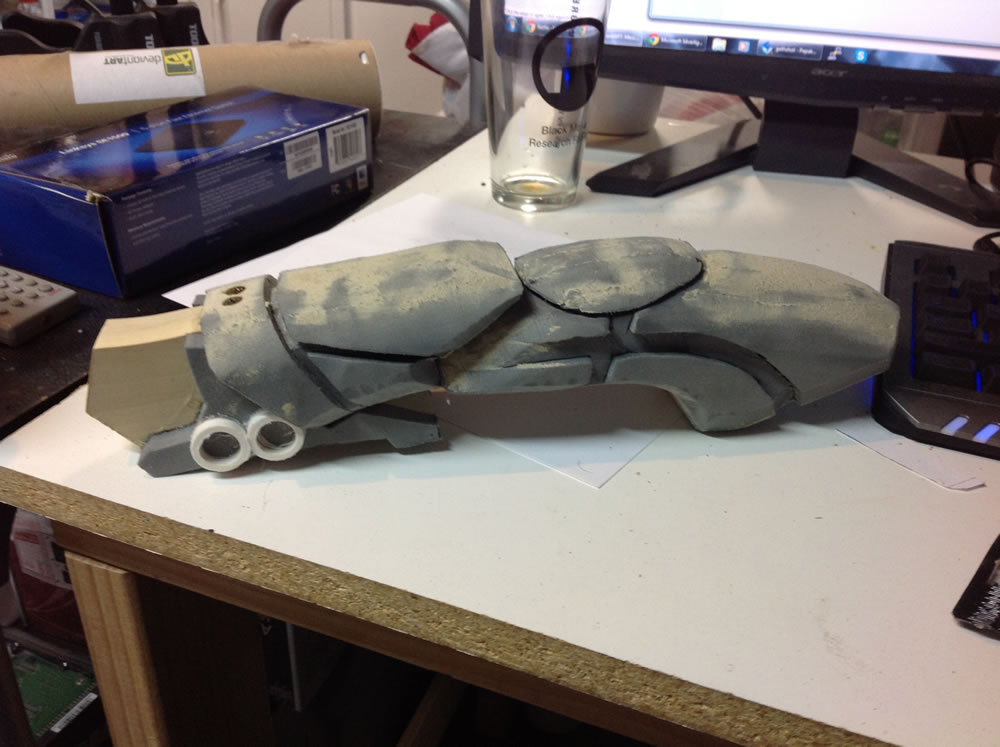
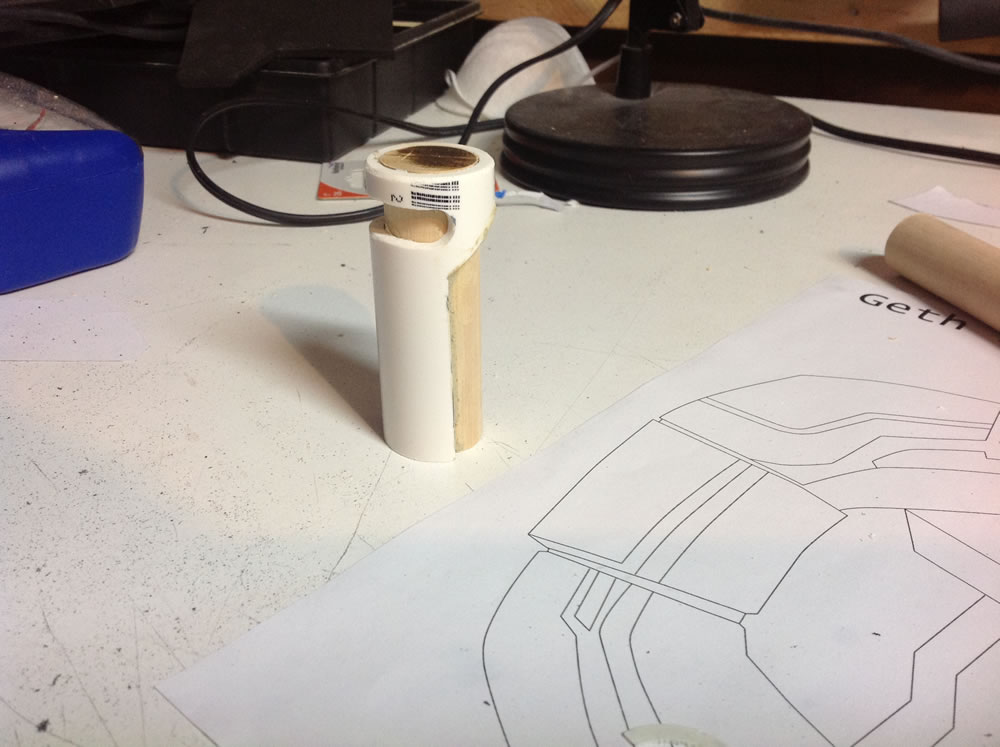
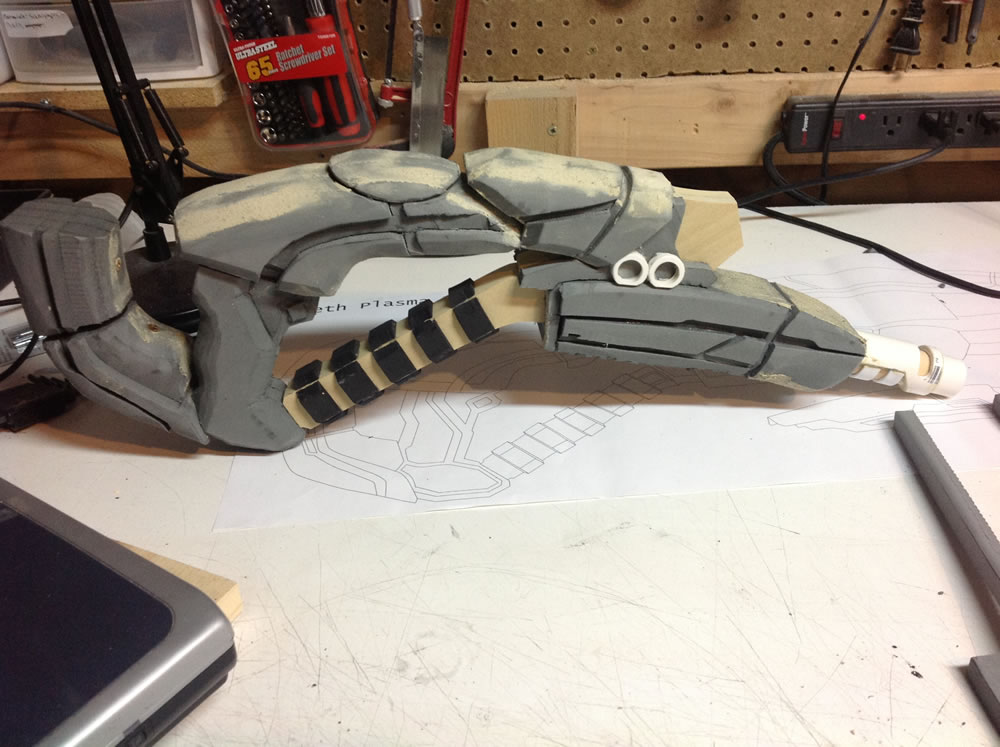
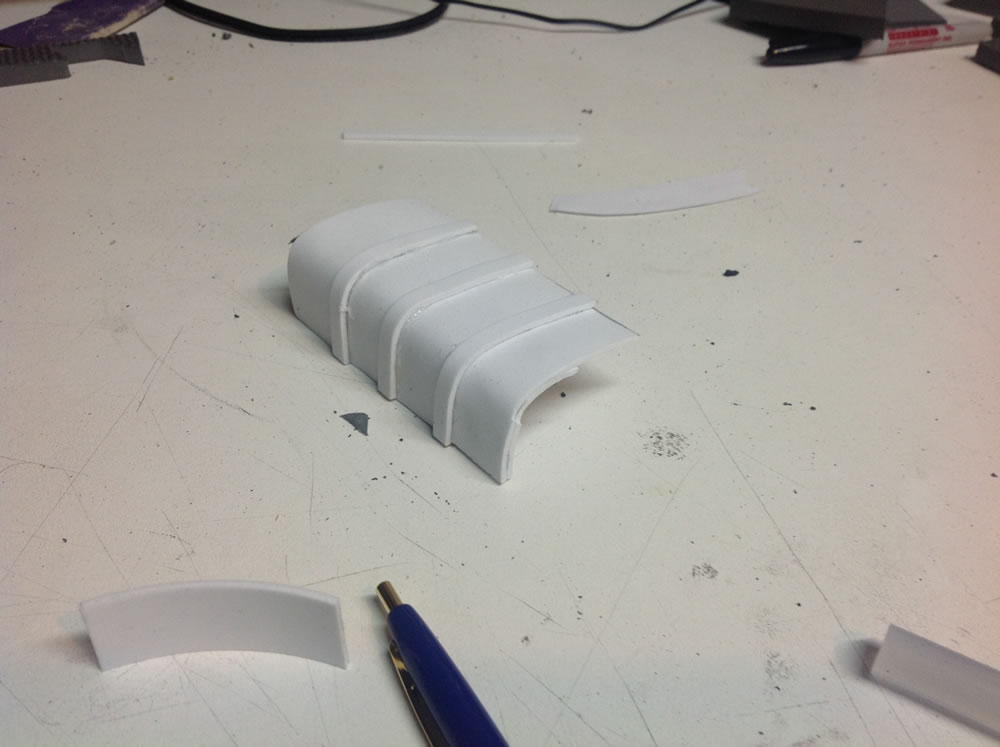
Reassembled first section.
When I glued down the top section there, the little round one, I elected to sandwich in a piece of thin craft foam. This offset it slightly from the others, since it looked to me on the model piece to be a significant height off the rest of the gun (some type of service door, perhaps?). After that, a few slices of PVC created the "ports" on the sides, and a wooden core up front to provide a sturdy base to add the enormous front barrels, as well as a disassembly point.
As you can see, I used wood filler to begin the smoothing process. Again, I strongly suggest waiting to do such work at a later time; I find when I'm in the heat of a build like this, I move fast, sometimes unwittingly. If you speed through that process I promise you won't like your results.
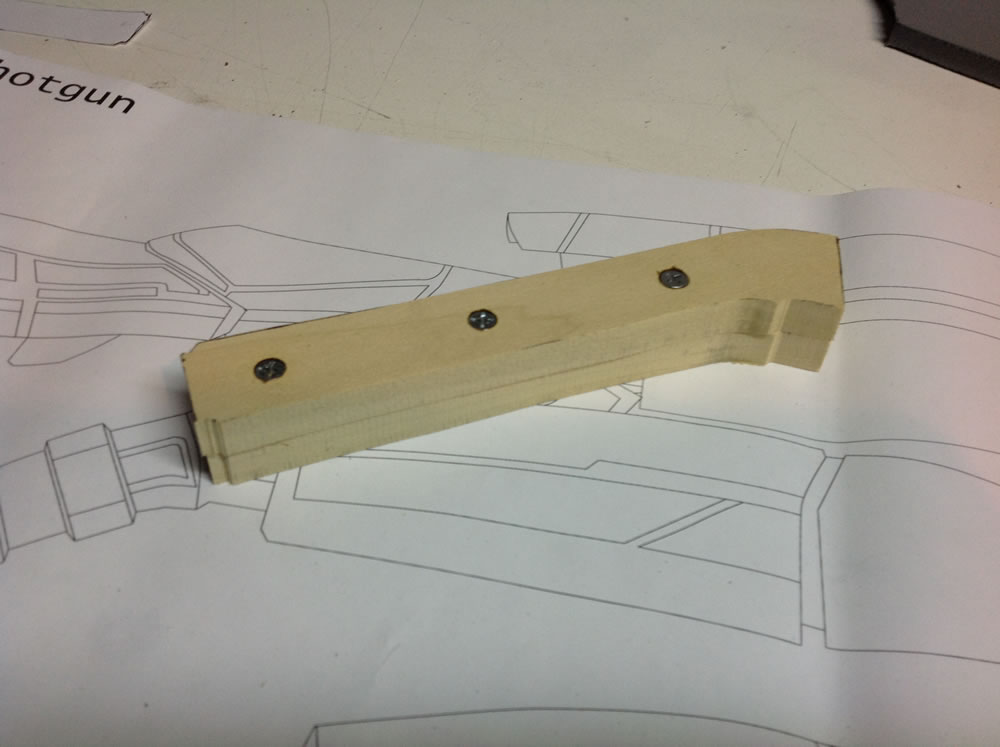
Base frame component.
From there, I switched materials to wood, specifically pine, to create some of the more spindly components of the gun. I started with what I consider the trigger guard, the piece that goes from the bottom of this section to the base of the pistol grip. Carved two pieces relatively simply with the band saw.
I drilled a small hole three times, then a much larger one about 1/3 of the way through the wood to create a slot for a screw head. This allowed me to screw it together 3 times, after applying some wood glue, so the pieces would sooner shatter than separate. This is important, as a repair of that magnitude would almost certainly require a complete rebuild.
From there, I cut 3/4 inch strips of thick craft foam, glued them down, and trimmed them, making a slow round of the strut. Once I had four pieces on each band, I used the hot knife again to bevel them, two pieces at a time, into the required shape. Taking the time to do these steps separately gives a much cleaner looking result, so take the time. :)

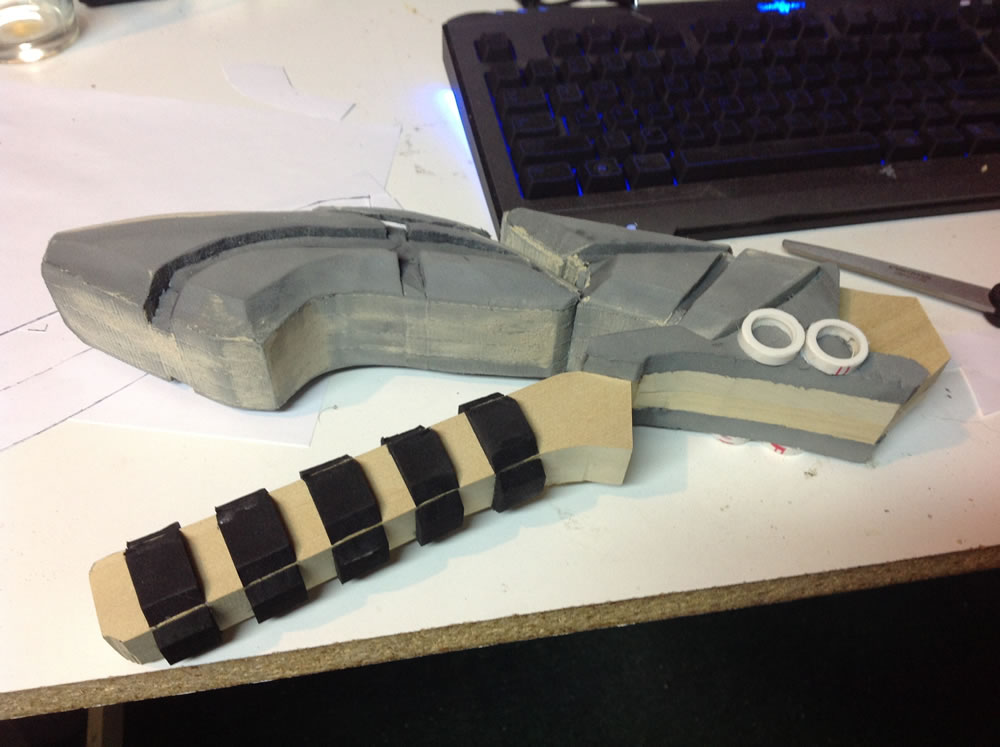
Process summarized in photos.
As you can see, I got a little excited and attached it before snapping the picture. :D

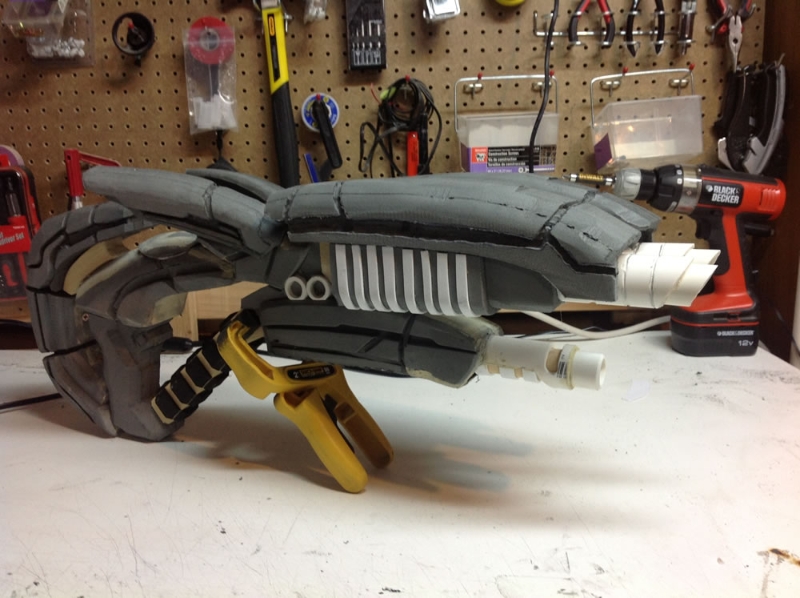
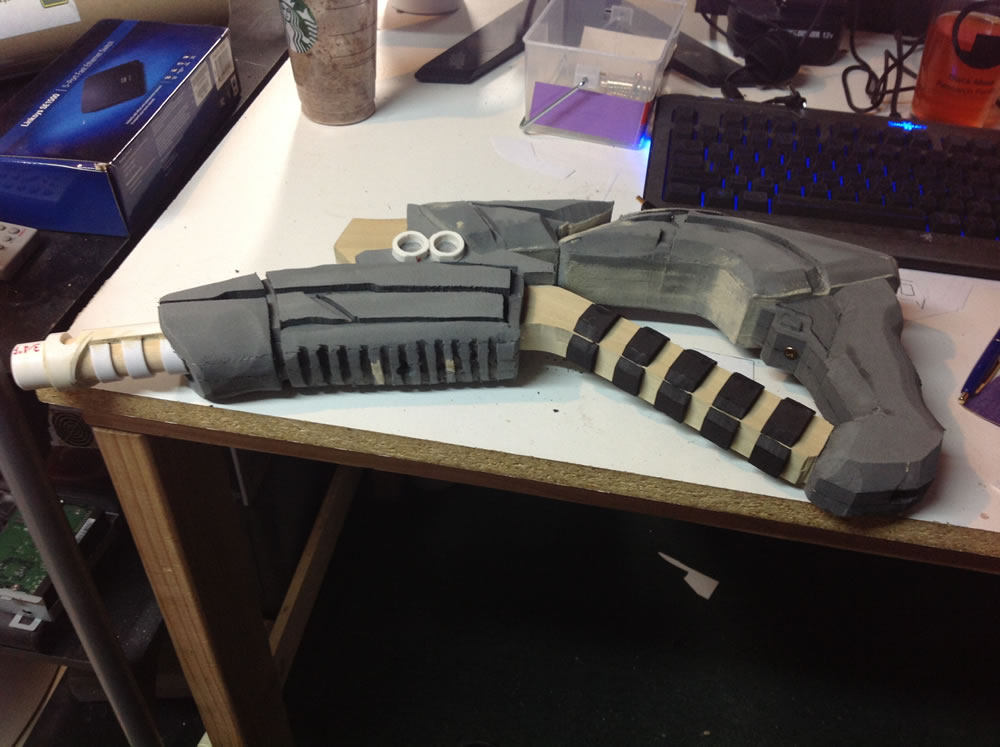
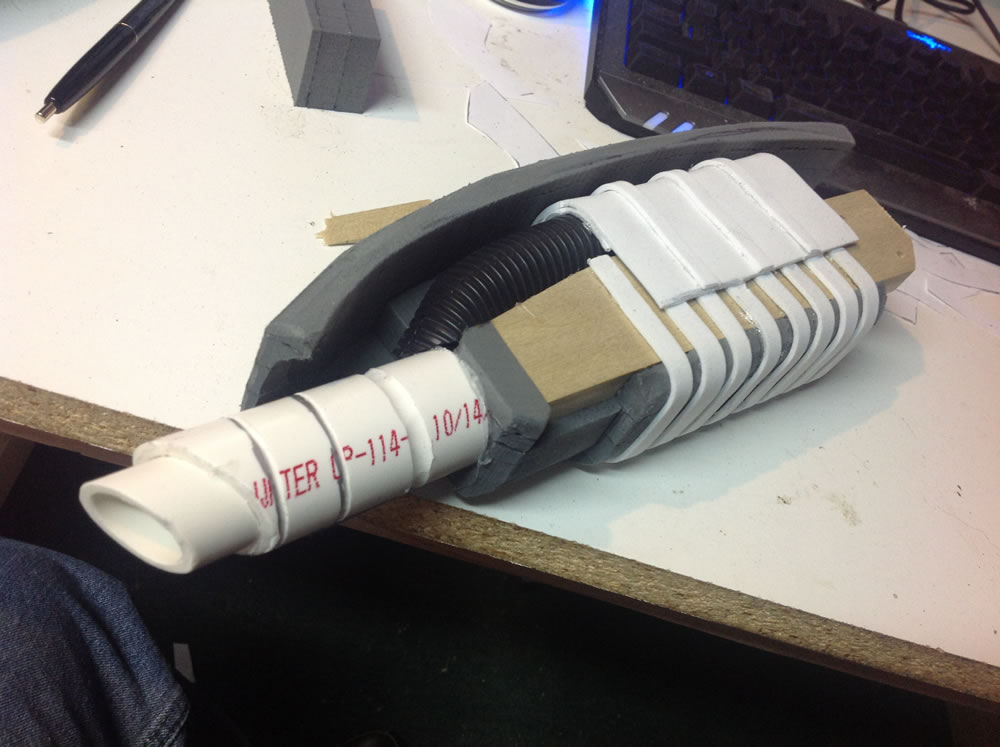
Assembled main body.
After that, I used the old carving technique once more to fashion the pistol grip for the shotgun base. Nothing overly spectacular there, so we'll jump to that being attached.
I should point out, with a build like this where the painting and finishing work is going to definitely be complicated, I've made most of the components so far removable in one way or another. This is of course temporary; with the foam, screws and bolts only do so well, glue is better. Once the piece is painted and finished, we'll get there. :)
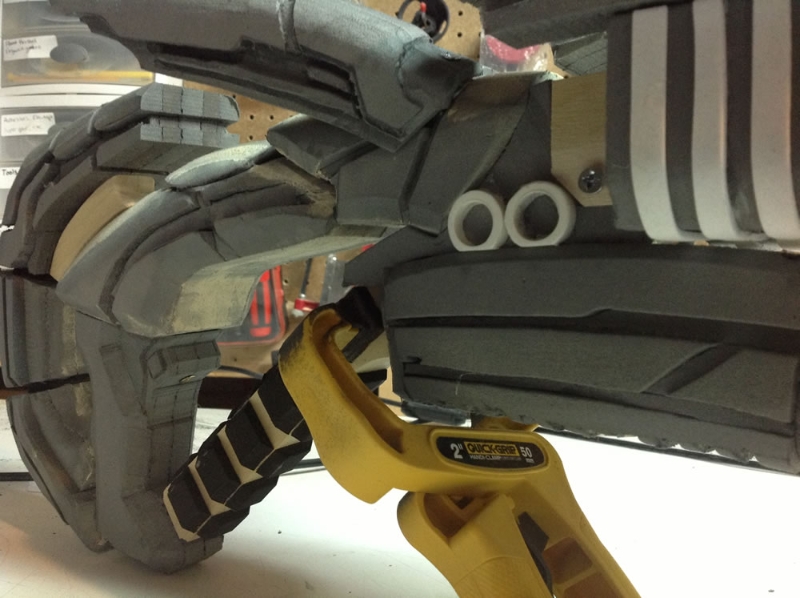
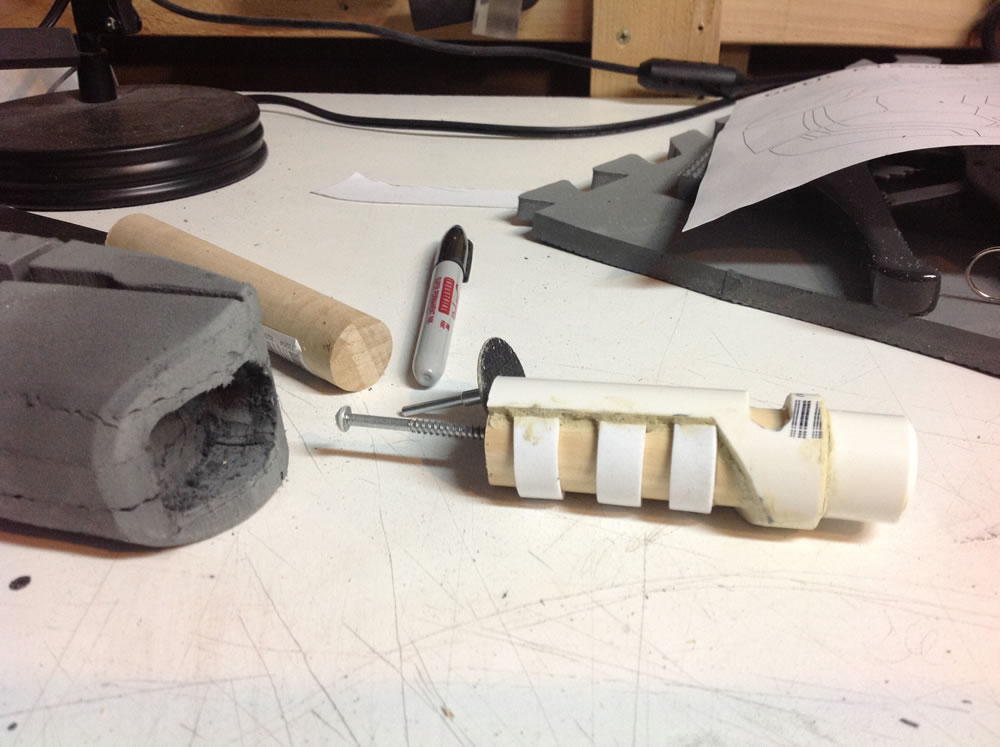
OK, up next I tackled the lower barrel, which has a surprisingly complex design for being such a small component. I started with a 1 inch oak dowel and a section of i inch PVC pipe, cut to length. I used the band saw to slice the pipe halfway through down the middle, then at a 45 to create the main shape. Repeat the process with two perpendicular slices, followed by a round in the drill press to finish the front slot cut, and we have the first picture. Forward, I add small slices of the thin craft foam to finish the main component, and add a section of 3/4 inch PVC to the front end, making the barrel tip. All this is simply attached with hot glue and a steady hand. Finally, to provide anchoring without drilling a huge hole in the foam, I insert a large construction screw into the back end of the barrel. That brings us to photo 2. Finally, I build the lower grip section out of foam, again, nothing unusual here, same method as the main body, finished with Dremel grooving on the bottom, and we're to number 3, the completed lower section.
Finally, the stock. This is one of the simpler elements, surprisingly, since it's just continuous material with no lights or goofiness, so it's just foam components, assembled.
Tip: The stock's inside surface has three separate sections of "grip" in it. If you intend to use Plastidip or Leakseal on these components for the rubber feel, make sure to make these components removable. I used a simple screw, and before painting, filled the holes with wood filler and sanded to smooth finish, then attached post-painting with glue. Looks amazing, and much easier than attempting to mask these complex shapes.
The construction of these elements, again, is very uneventful, so I'll show you some pretty pictures and we'll proceed. :)
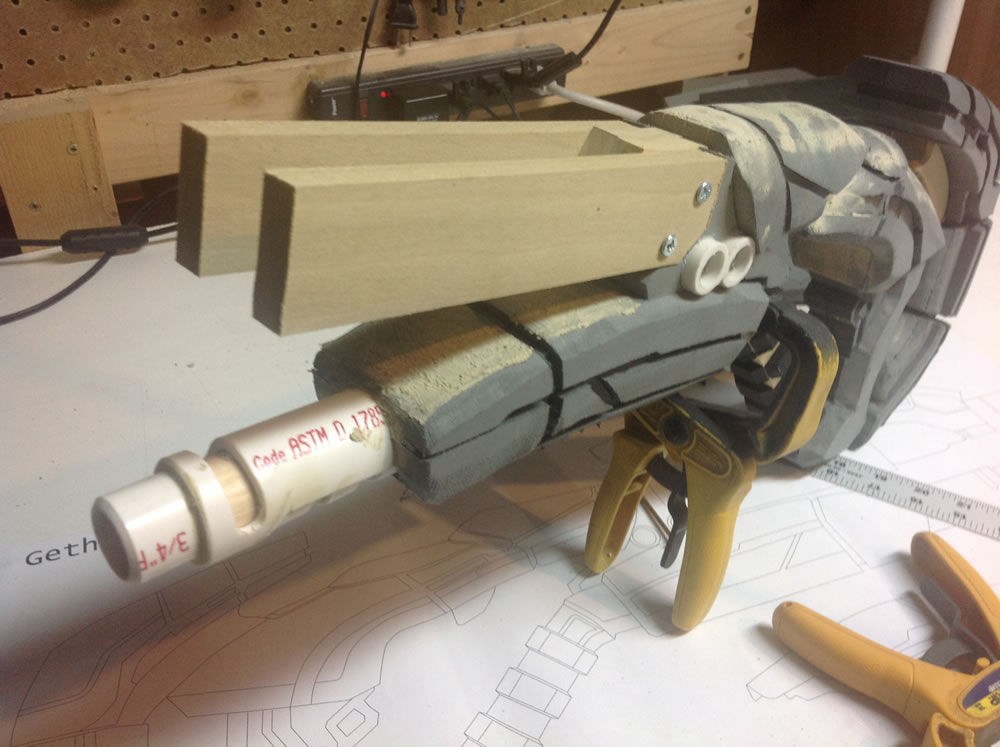
Struts added.
Going forward, I started on the large front barrels that make this weapons big appearance. We start with two large structural wooden struts, Cut roughly to length and size, and screwed onto the large piece of wood at the front. This setup will allow the barrels to be removed even after final assembly for shipping and other transportation. These in my mind are by far the most fragile components, since they are two very large ones sticking out in front, prime location to be bumped and banged in a convention hall. The decision was made early on that these would be made of a large structural wood section to compensate for the fact that there is nothing between them once they leave the gun body.
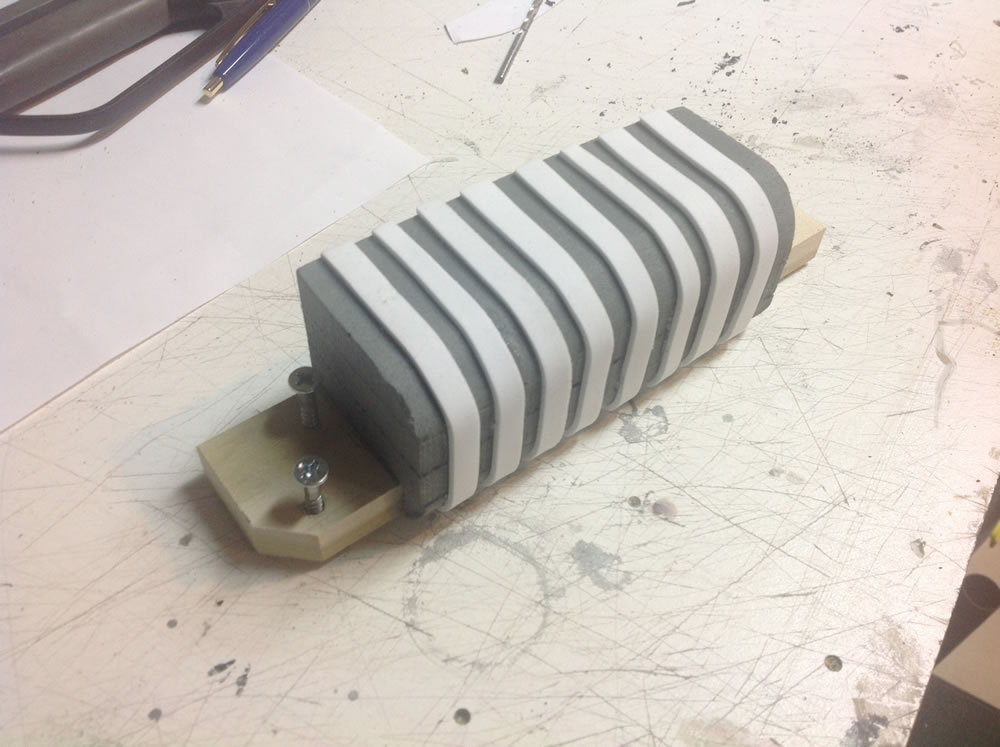
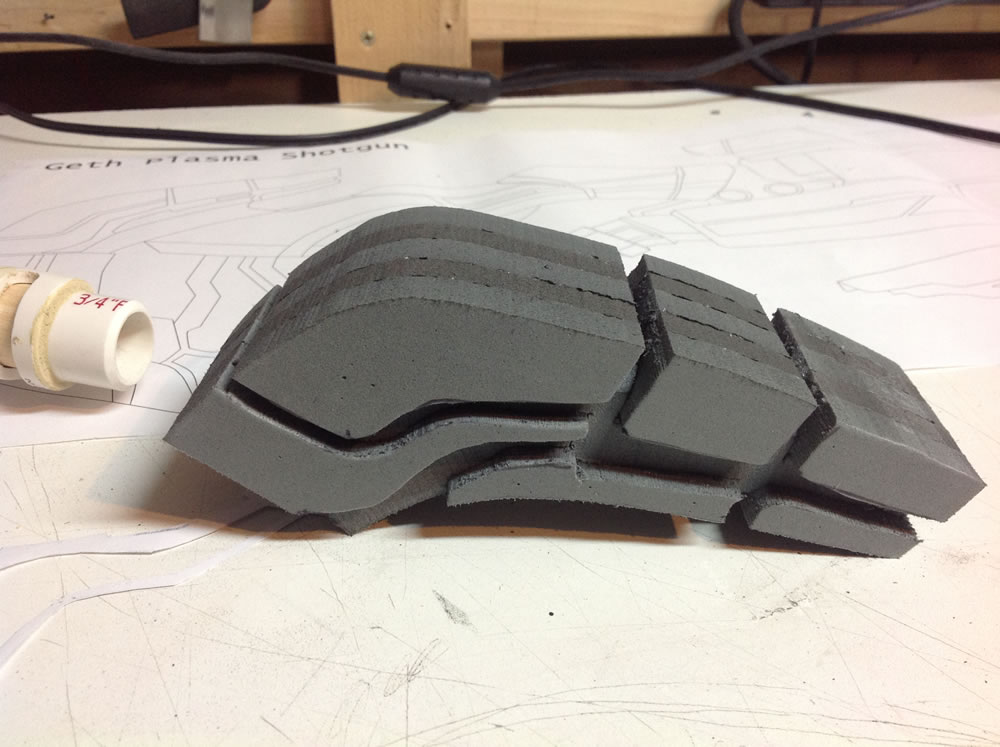
Ribs on the main barrel section.
Next, I started on the barrels themselves, which again were surprisingly complex. I elected to build it in one foam section and just deal with the masking issues, simply because the components required to do a temporary attachment would harm the finish of these highly prominent pieces. I started by removing the struts once more, and building onto them with foam, incorporating the struts as part of the external finish. Once I had a base "block" done, I added the small ribs to the inside surface, wrapping them around the rounded corner to enhance the effect.
Outer shell.
Next, the outer clam shell was built, with padding on the inside surface to raise it up from the outside, giving the "ridge" look in the game model of this component. A big part of the Geth weapons isn't just what's there, it's what isn't; they incorporate a lot of negative space, which adds uniqueness to their design.
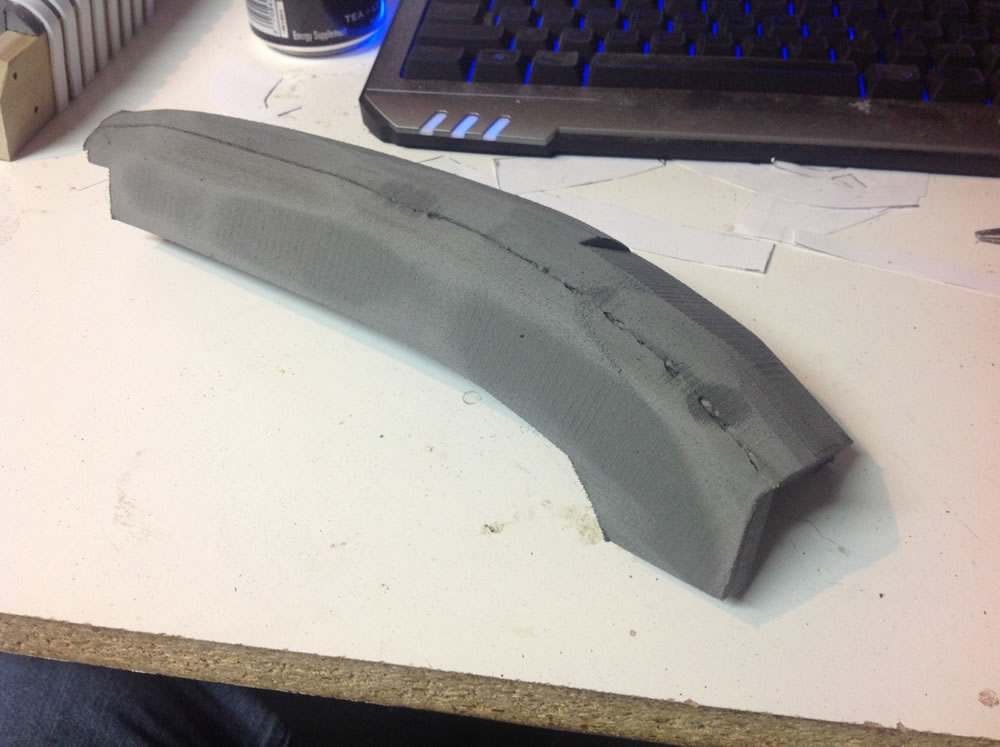
Inner block section finished.
Continuing on the negative space, there is also a secondary "box" element on the inside, along with an opening (presumably for cooling or discharge). I constructed this separately out of thin craft foam wrapped around a block of EVA.
This whole process required very little heat shaping, surprisingly. I opted instead to simply make sure there was a lot of surface to reliably attach the foam to, making sure that it would maintain it's shape long after the glue had cured. Months down the road, everything still looks great.
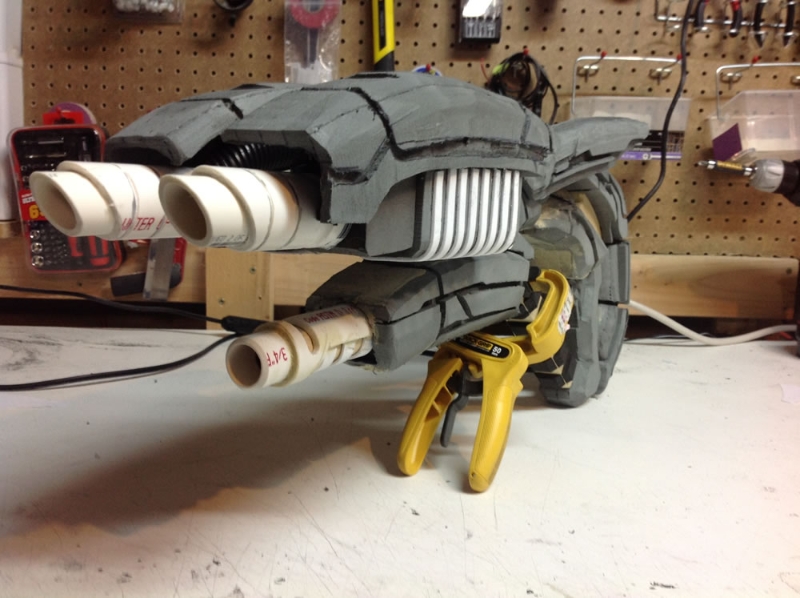
Final barrel assembly for the right side.
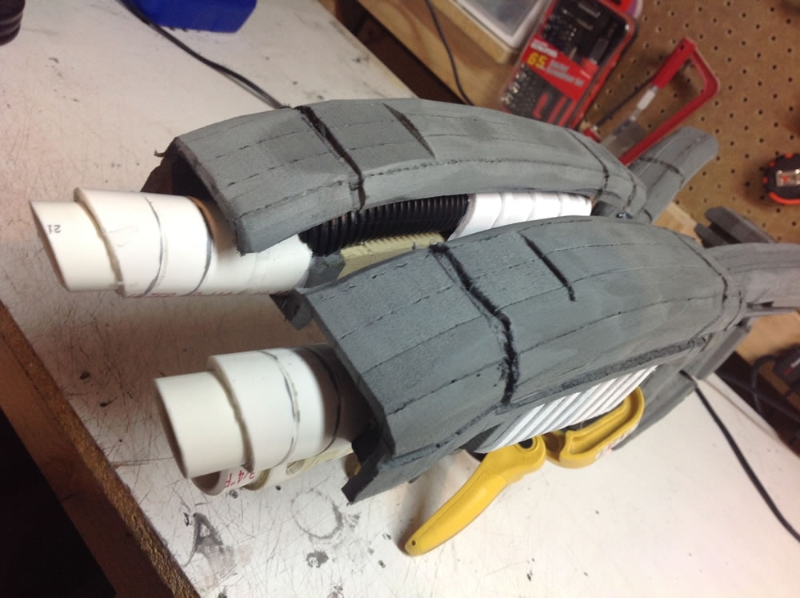
Finally, we put it all together, and add some flexible conduit pipe I found at Home Depot. Just trimmed it to fit the shapes of the end, and we have perfect looking mechanical tubing.
The barrel tip is simply a piece of 1 inch PVC mounted on the end of a piece of 1 1/4" PVC, with some grooves added. I found the band saw worked much better at producing the grooves, by just placing the pipe against the moving blade and allowing it to spin a little, you get a very consistent looking groove effect with much less effort than a standard Dremel based affair.
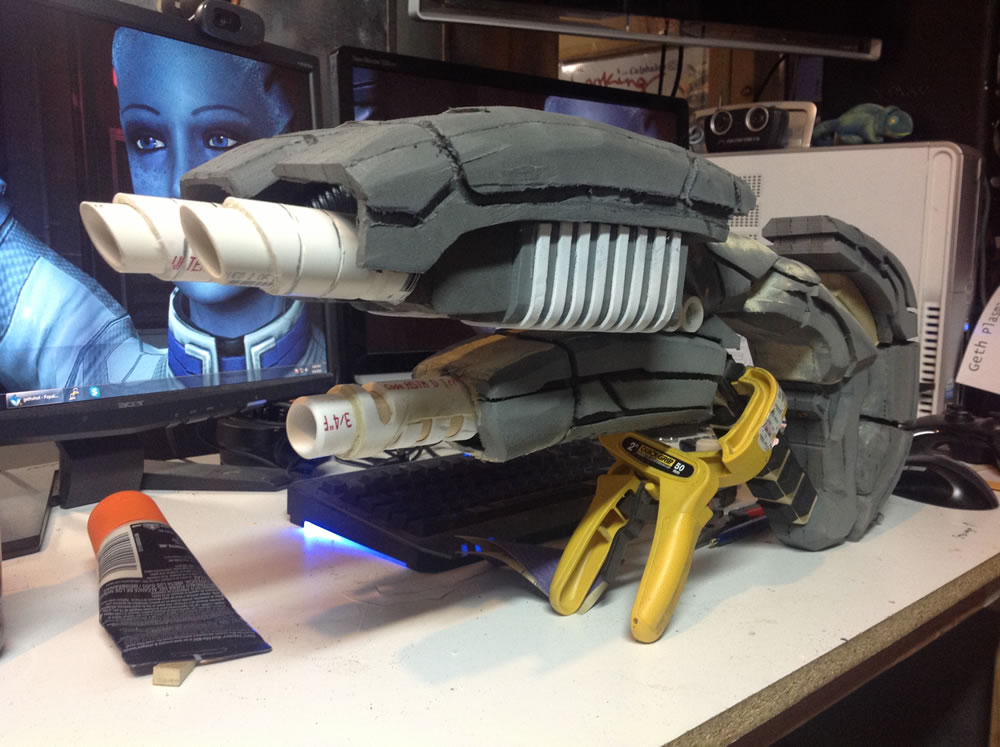
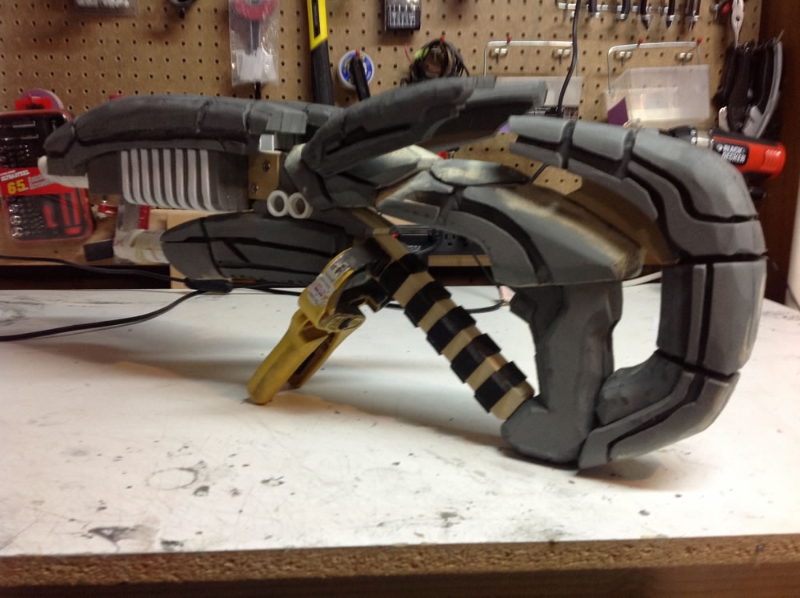
Barrels mounted.
After that, we attach it. The problem with these tasks; when you finish, you're only halfway done. Repeated process, mirrored, for the other side, and viola.
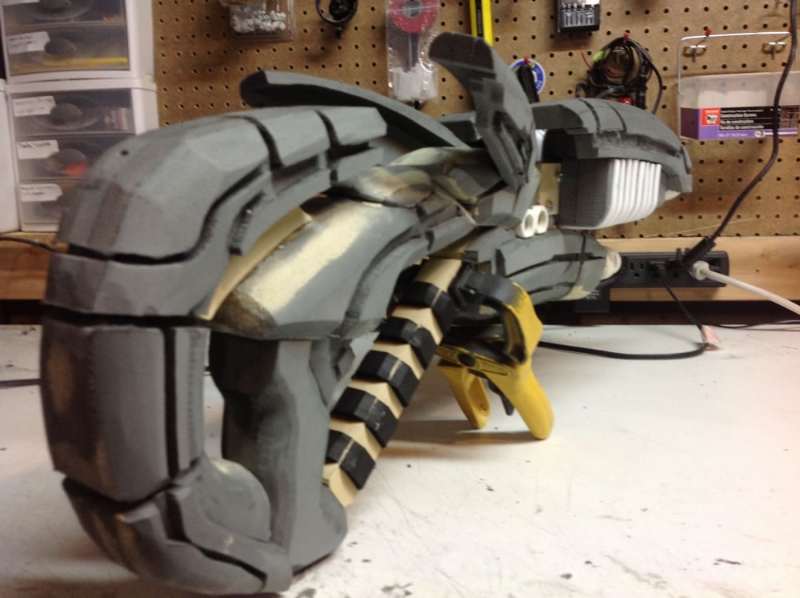
The last remaining piece is what I call the wings. They're small pieces extending from just above the main body that hold LEDs, and also flex when the gun is fired in the game. Initially I had intended to build the gun so when you worked the pump action, it would pull the wings downward, but in the end this had to be scrapped for version 1.0. Regrettably, my scatter brain forgot to take photos of the wings when they were being made, but the process wasn't complicated; they're simply two layers of EVA foam, carved accordingly (the band saw method proved unsuitable for parts of this size, the saw simply ate the components), and mounted with little screws. Note, this parts are not rigidly attached andshouldn't be, instead, they should be allowed to move and flex. You can always scoot them back, but made rigid, if these take a hard hit they will snap and crumble. Normally this isn't a huge issue, but these little things also contain LED lighting, so their replacement would be difficult at best.